The Strategy Tips for Crazy Planets is finally released.
This is the Monster Chart of all monster in Crazy Planets. Only the Gigantic Robot can be
encountered after you reach level 15.
This is the Weapons chart for Crazy Planets. Most commonly used weapon will be Bazooka and
Cluster Bombs. Homing Missile is good too but require quite a lot of metals.
Weapons Listing
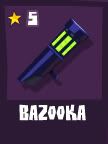
Bazooka
The bazooka is one of the basic weapons that you start out with. While its damage isn’t the best,
and doesn’t get that much more powerful as you upgrade it, it still remains a good weapon to
use, as it is accurate (excepting the really long shots). To fire, simply aim (the white trail line is
very useful), and fire. The blast radius is very small. It takes 2 shots to kill a basic robot, and as
you can see from the figures below, you need to upgrade to level 4 before it can kill a basic robot
in 1 hit. For firing short distances, the white pointer trail should be good enough. For longer
distances, increase the power (move the mouse away from your avatar for a stronger shot), and
flatten the curve of the white pointer trail. Basically you want to shoot the enemy in the
stomach as hard as you can.
Level 1: 25 damage **Starter Weapon**
Level 2: 31 damage 20 Opal, 20 Agate, 20 Steel, 20 Zinc
Level 3: 38 damage 35 Opal, 35 Agate, 35 Steel, 35 Zinc
Level 4: 44 damage
Level 5: 50 damage 100 Opal, 100 Agate, 100 Steel, 100 Zinc
-------------------------------------------------------------------------------------------------------
Grenades

These green babies are your other starting weapon, but they are not as accurate as the bazooka.
To fire, aim and throw. However, when the grenade lands, it bounces … the longer the grenade
falls down from the apex of its path (the top of the curve or the end of the white pointer trail),
the larger the bounce. The bounce is also affected by gravity, and so will tend to go downhill. If
the bounce ends up on a slope, the grenade will also roll downhill. Finally it explodes, and
hopefully next to an enemy robot. The blast radius is a decent size on grenades.
Level 1: 30 damage **Starter Weapon**
Level 2: 38 damage 20 Agate, 20 Emerald, 20 Zinc, 20 Nickel
Level 3: 45 damage 35 Agate, 35 Emerald, 35 Zinc, 35 Nickel
Level 4: 53 damage
Level 5: 60 damage
-------------------------------------------------------------------------------------------------------
Cluster Bomb
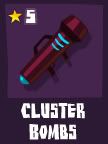
Everyone’s favourite weapon due to the large amount of damage that it can do. The cluster
bomb is the same as a bazooka until the missile goes just past the apex of its trajectory, when it
splits into 3 smaller missiles, each dealing the same damage.
Obviously, as can be seen in the picture, the robot is going to be hit by all 3 mini-missiles, thus
dealing the max damage. A level 1 Cluster Bomb deals 20 damage, so if you hit the enemy
before the missile splits, you deal 20 damage. If you hit the enemy with all 3 mini-missiles, you
deal it 3x20 or 60 damage. Small blast radius.
Level 1: 20 damage x3 40 Amethyst, 20 Citrine, 30 Copper, 20 Silver
Level 2: 25 damage x3
Level 3: 30 damage x3
Level 4: 35 damage x3 120 Amethyst, 60 Citrine, 95 Copper, 60 Silver
Level 5: 40 damage x3 200 Amethyst, 100 Citrine, 150 Copper, 100 Silver
-------------------------------------------------------------------------------------------------------
Energy Sword
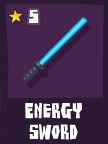
This weapon looks very familiar … from a certain movie perhaps? Anyway, it’s a very forceful
weapon, and basically you swing it left and right, and anyone standing on either side of you
(also up and down a little bit), will take damage. While it is fairly powerful, its downside is that
you need to stand right next to the enemy, and also if you do kill it, there is a fair chance of
taking damage from bits exploding from the corpse. If you are standing uphill, this chance is
reduced a lot.
Level 1: 50 damage 40 Amethyst, 20 Sapphire, 40 Silver, 20 Lead
Level 2: 63 damage 55 Amethyst, 25 Sapphire, 55 Silver, 25 Lead
Level 3: 75 damage 80 Amethyst, 40 Sapphire, 80 Silver, 40 Lead
Level 4: 88 damage
Level 5: 100 damage
-------------------------------------------------------------------------------------------------------
Big Boomer
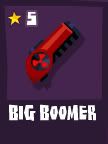
The Big Boomer is a different type of weapon in that the missile (a spike) doesn’t deal damage
by itself. Basically you fire the spike, and it embeds itself in the ground where it lands …
waiting. When any explosion nearby (from a weapon or otherwise) occurs, the spike then
explodes causing massive damage. It also has a massive blast radius as well, so don’t stand close
by. So the whole idea is for 1 player to land this close to a powerful enemy, and the second
player to trigger it off the next turn, killing the enemy if he hasn’t moved too far away. Another
use is for getting the triple kill medal.
Level 1: 100 damage 30 Sapphire, 30 Ruby, 40 Lead, 40 Platinum
Level 2: 125 damage
Level 3: 150 damage 60 Sapphire, 60 Ruby, 80 Lead, 80 Platinum
Level 4: 175 damage
Level 5: 200 damage
-------------------------------------------------------------------------------------------------------
Fluff Bombs
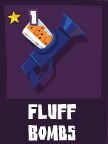
Fluff Bombs are another unusual weapon in that they cannot fire upwards, the flight path tends
downwards, and not very far. Once fired, three little orange fluffs come out, and bounce their
way forwards. While these fluffs can get ‘trapped’ so to speak, against the feet of an enemy,
generally they tend to bounce up and over the enemies, so their accuracy isn’t very good at all.
Their damage is fairly decent at level 1, 30, and their blast radius is small. The best use for these
is firing them across a long stretch of even ground, or better still, into/along an underground
corridor at an enemy. Another thing to remember when firing these is that the higher the arc,
the bigger the bounce … and the more power, the further they go before they explode. Unless
you need to bounce them over an object, the best is to use a very flat trajectory, and they will
roll along the ground and not bounce at all. Here is a before and after in one ... the robot is
about to get hit from 3 little cute
Level 1: 30 damage x3 30 Citrine, 40 Sapphire, 30 Silver, 40 Lead
Level 2: 38 damage x3 40 Citrine, 55 Sapphire, 40 Silver, 55 Lead
Level 3: 45 damage x3
Level 4: 53 damage x3
Level 5: 60 damage x3
-------------------------------------------------------------------------------------------------------
Homing Missile
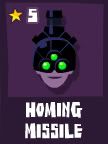
The Homing Missile is the most accurate weapon. You can aim directly anywhere on the map
(NO NEED TO TARGET A ROBOT), and a missile will fire upwards, arc across, then down and
land on top of the robot. If there is a wall above you or the target spot the missile will collide
with this and explode there instead. This is a good way to trigger off a Big Boomer spike. If you
are standing close to the target, the missile tends to overshoot slightly and then curve back in,
hitting the target from the side opposite you.
Level 1: 25 damage 50 Ruby, 100 Topaz, 100 Platinum, 50 Gold
Level 2: 31 damage 65 Ruby, 130 Topaz, 130 Platinum, 65 Gold
Level 3: 38 damage
Level 4: 44 damage
Level 5: 50 damage
-------------------------------------------------------------------------------------------------------
This is the Special Abilities Chart. A power-up functions.
-------------------------------------------------------------------------------------------------------
Spending Coins for extra abilities during battle
At the bottom of your screen are 5 buttons where you can purchase help during missions.
However, you pay for these out of the coins that you have collected. Are these worth it?
Definitely. The 5 are:
* Restore Health – Brings your health up to its maximum … always useful if you are very low
and about to take damage.
* Double Damage – You need to take out that big robot this turn, or take damage and not get
a Flawless medal? Double damage lasts till the end of the mission ... how great is that?
* Double Max Health – Be aware that this doubles your max health and your current health.
So if you are at 75/100 hp, using this will bring you to 150/200 hp. You can only buy this once a
mission, but it stays till the end of the mission.
* Shield – This reduces all damage down to zero …. for the current turn and the next turn. You
can fire each turn while shielded. Look down below ... if the shield icon is sparkling, you are
currently shielded. So best use would be for your player to use shield and then just sit there
soaking up the damage while the other team members take out the robots one by one.
Remember that robots aim for the nearest player.
* Accuracy – Instead of only seeing the first half of the white pointer trail, you see a full arc.
You can only buy this once a mission, and it stays till the end of the mission.
Details Source : Luggage // Playfish Forum
-------------------------------------------------------------------------------------------------------
Probably the most important bit … things to remember when playing:
* To move your player, simply click the place where you want s/he to end up at. Make sure that
your cursor is showing an arrow, and not a hand. This was a little tricky for me at first, because I
thought you had to click the planet’s surface, but it appears you have to click above the planet’s
surface. If your player ended up against a slight edge, s/he might not want to/be able to climb
that. Instead, move him/her back a little, and try again (so to give him/her a short run at it).
Within your 30 secs, you can walk nearly around the entire planet if its fairly flat, and still give
yourself time to shoot.
* The hand tool (when you move the cursor below the planet’s surface), is the zoom function in
the game. Simply click and hold the left mouse button, and move the cursor left/right to zoom
in and out. This works the best the higher up your player is. If your player is underground, or
close to the planet’s core, the zoom will not extend up high enough for flying enemies.
* When you are going up a lift, to save a tiny bit of time, make sure (or move a touch) so that
your player won’t bump his/her head against the underside of any above surfaces, as the lift
slows down while it shuffles you across. Likewise, you can also start to walk off the lift early
before it stops moving.
* If you are stuck for a place to hide/take cover and will probably be hit next turn, position
yourself so you are standing in the same spot as an enemy. All robots cannot aim close enough
to damage themselves, so if it’s a fixed position robot, you are safe from that robot, and the
moving ones generally don’t move that far either. The other bonus is that if another enemy
fires on you, causing damage to you, the enemy you are hiding behind also takes damage.
* Plan your attacks when fighting against powerful enemies. Once you know which robot will
fire next, sometimes its better to leave a smaller robot alive so that will maybe deal a small
amount of damage and you can kill the biggie the next round. Otherwise the powerful robot will
have his turn, and you take lots of damage. This gets more important the higher stage/level you
get.
* You can pass (not fire) by either letting the timer run out, or clicking on the ‘X’ just below
your player. If you have a weapon ready to be fired (the white pointer trail is showing), clicking
the ‘X’ will unready that weapon, and you can then move or ready the other weapon.
* Another good trick is to remember that any robot will aim for the nearest player. So if that
player is safely hidden behind cover, the robot effectively loses his turn, and if you are lucky
hits the wall causing damage to himself.
* When tossing grenades anywhere, if you keep the top of the throw arc as close to the surface
as possible, the grenade doesn’t bounce at all. This means you can use grenades instead of a
bazooka shot and deal more damage.
* When firing any missile, remember that the planet’s gravity has an effect on the missile, so if
you do a long strong powerful shot, the missile will end up travelling around planet. This is
useful for getting the ‘fire halfway around the planet and hit an enemy’ medal. Generally
speaking tho, the hitting an enemy is a chance. The best I have done is shoot a bazooka missile
the entire way round a planet, and land it a bit past myself. You could pay for the ‘Accuracy’
option tho.
* To pause your game (there is no pause button as yet, simply hit the ‘exit game’ in the bottom
left corner, and when the confirmation box pops up, just leave it at that hanging.
* Have extra coins and need more xp? Then remember … at the end of each completed mission,
you get the xp for the mission, plus a percentage of the same mission xp based on whatever
percentage of health all your team members ended up at.
E.g.
Paul’s health ends up at 100/100
John’s health ends up at 50/100
If the mission gave 2000 xp, then the bonus would be 1500 xp. However, if John didn’t take
part in the mission, Paul went solo and ended up on 100/100 health, the bonus would be 2000
xp. So, if you have spare coins, you can spend them on bringing your health back up to full just
before finishing the mission and getting more xp. Playing a mission solo means more bang for
your buck as well. If you have gotten double health, it is based on your maxed double health.
-------------------------------------------------------------------------------------------------------
Last but not least, More metals need more friends.

0 comments:
Post a Comment